AquaMag Documentation

AquaMag is a unique, modern and fully responsive magazine WordPress theme from Theme Junkie. AquaMag perfect for online magazines websites, news websites, personal blogs or community blogs.

Latest Version: 1.0.3
Released: Aug 13, 2014
Last Updated: Aug 26, 2014
Requires: WordPress 3.6+
License: GPL v2
Support: Forum Support
Changelog: changelog.txt
Developer: Theme Junkie
Twitter: @theme_junkie
Facebook: @themejunkies

Table Of Content

  1. Features
  2. Child Theme
  3. Installation
  4. Recommended Plugins
  5. Custom Background
  6. Custom Menu
  7. Category Menu
  8. Custom Widgets
  9. Logo Uploader
  10. Favicon Uploader
  11. Change Default Feed URL with Feedburner
  12. Create Home Page
  13. Setting Home Page

Features

Some of AquaMag cool features!

top

Child theme

Since AquaMag is a parent theme, you'll want to create a child theme if you plan on making any customizations. Don't know how to make a child theme? It's relatively simple. Just follow the below steps.

/**
 * Theme Name: AquaMag Child
 * Theme URI: http://link-to-your-site.com
 * Description: Describe what your theme should be like.
 * Version: 0.1
 * Author: Your Name
 * Author URI: http://link-to-your-site.com
 * Tags: Add, Whatever, Tags, You, Want
 * Template: aquamag
 */

/* Importing the parent theme stylesheet. */
@import url( '../aquamag/style.css' );

From that point, you simply need to start adding your own styles. The parent theme styles will automatically be loaded for you.

Reference top

Installation

Installation

Through Dashboard

  1. Log into your WordPress admin panel and go to Appearance » Themes
  2. Click the Add New button at the top.
  3. Click the Upload Theme button at the top.
  4. Click the Choose File button and navigate to the location of the theme zip file.
  5. Click Install Now to begin the installation.
  6. Wait for the success message, then click Activate.

Installing Via FTP

  1. Unzip the theme zip file.
  2. Using an FTP client to access your host web server. Go to /wp-content/themes/ and place the theme folder inside it.
  3. Log in to your WordPress admin panel and go to Appearance » Themes
  4. Locate the theme thumbnail and click the Activate link.
top

Recommended Plugins

Plugins

When the first time you activated the theme, you will see the notice about recommended plugins for it like the picture above. If you feel the plugins is not needed, then you can click the Dismiss this notice to hide the notice.

If someday you need to install those plugins, you can go to Appearance » Install Plugins. Choose which plugin you want to install. Please note, the plugins is Recommended not required.

top

Custom Background

Custom Background

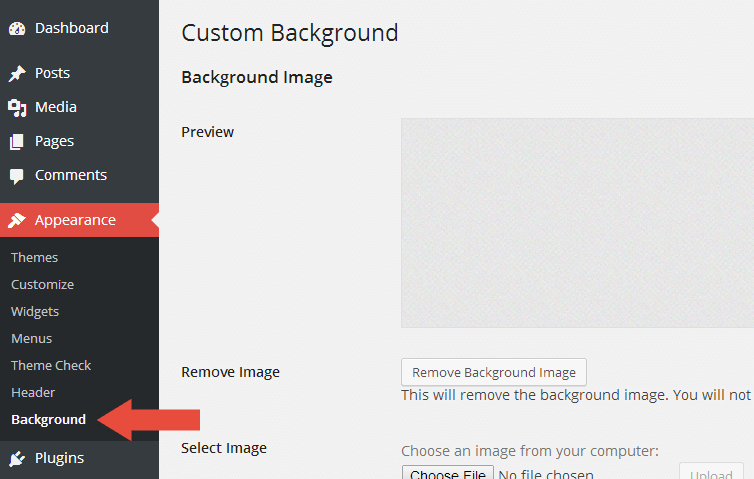
AquaMag has feature to change the default background using the native WordPress custom background function. To use it, please follow the steps below:

  1. Go to Appearance » Background.
  2. You can either set the image or color as background.
  3. Click the Save Changes button when you finish.
top

Custom Menu

Custom Menu

AquaMag supports the custom menu function to allow you to setup your menus. You can set it through following steps.

  1. Go to Appearance » Menus.
  2. To create a new custom menu, click the create a new menu link, give the menu a name, and click Save Menu button.
  3. You can add pages, categories or custom link's to the menu.
  4. And, be sure to select Primary Menu or Secondary Menu for the Theme Location before saving your menu.
  5. When you are done, click Save Menu

Please go to Codex Help for more detailed instruction.

top

Category Menu

To build multi-level menu, you need to position the 'child' underneath its 'parent' and then drag it slightly to the right.

Back-end Settings

Front-end Appearance

top

10 Custom Widgets

Custom Widgets

AquaMag comes with 10 cool custom widgets to give you more flexibility to customize your site.

  1. Advertisement - Easily to show your ad, adsense, amazon, etc.
  2. Advertisement 125x125 - Easily to show your ad, adsense, amazon, etc.
  3. Feedburner - Allow your reader to subscribe your posts through feedburner service.
  4. Flickr Photostream - Display photo galleries from your Flickr account.
  5. Most Views Posts Thumbnail - Display most views posts along with thumbnail.
  6. Popular Posts Thumbnail - Display popular posts by comments along with thumbnail.
  7. Random Posts Thumbnail - Display random posts along with thumbnail.
  8. Recent Posts Thumbnail - Display latest posts along with thumbnail.
  9. Posts Slider - Display a list of posts with custom slider.
  10. Video - Easily to display your video from some popular video website such as youtube, video, etc.
top


Upload Your Custom Favicon

Custom Logo
  1. Go to Appearance » Theme Settings.
  2. Open the General tab.
  3. Look at Favicon Uploader section.
  4. Click the Upload button, then pick the favicon from your hardisk.
top

Change Default Feed URL with Feedburner

Custom Feed
  1. Go to Appearance » Theme Settings.
  2. Open the General tab.
  3. Look at FeedBurner URL section.
  4. Put your feedburner URL in the box.
top

Create Home Page

  1. Go to Pages » Add New.
  2. Fill in the Title.
  3. Switch the 'Template' in the Page Attributes widget. Change it to the Home template
  4. Then, go to Settings » Reading.
  5. See the Front page displays option, check the A static page (select below) then in the front-page drop-down choose the page you already created before.
top

Setting Home Page

  1. Go to Appearance » Theme Settings.
  2. Open the Home Page tab.
  3. Please take a look images below to see the setting area.

Featured Posts

First Category Posts Area

Second Category Posts Area

Third Category Posts Area

Fourth Category Posts Area

top

Go To Table of Contents